pldebugger require recompile with postgresql source code. A little bit hard to setup.
Lucky enough, debian provides already compiled version.
Strech: version 10
Buster: version 12
FROMpostgres:12MAINTAINERray@ray-xENVPG_MAJOR12ENVPG_VERSION12.3-1.pgdg100+1
# Install the postgresql debuggerRUNapt-getupdate\&&apt-getinstall-y--no-install-recommends\postgresql-$PG_MAJOR-pldebugger
EXPOSE5432
Start the docker and you should see:
pgdbg           |
pgdbg           | PostgreSQL Database directory appears to contain a database; Skipping initialization
pgdbg           |
pgdbg           | 2020-06-11 03:00:46.211 UTC [1] LOG:  starting PostgreSQL 12.3 (Debian 12.3-1.pgdg100+1) on x86_64-pc-linux-gnu, compiled by gcc (Debian 8.3.0-6) 8.3.0, 64-bit
pgdbg           | 2020-06-11 03:00:46.211 UTC [1] LOG:  listening on IPv4 address "0.0.0.0", port 5432
pgdbg           | 2020-06-11 03:00:46.211 UTC [1] LOG:  listening on IPv6 address "::", port 5432
pgdbg           | 2020-06-11 03:00:46.214 UTC [1] LOG:  listening on Unix socket "/var/run/postgresql/.s.PGSQL.5432"
pgdbg           | 2020-06-11 03:00:46.290 UTC [26] LOG:  database system was shut down at 2020-06-21 03:00:32 UTC
pgdbg           | 2020-06-11 03:00:46.314 UTC [1] LOG:  database system is ready to accept connections
Notes that the logs began with pgdbg instead of postgres
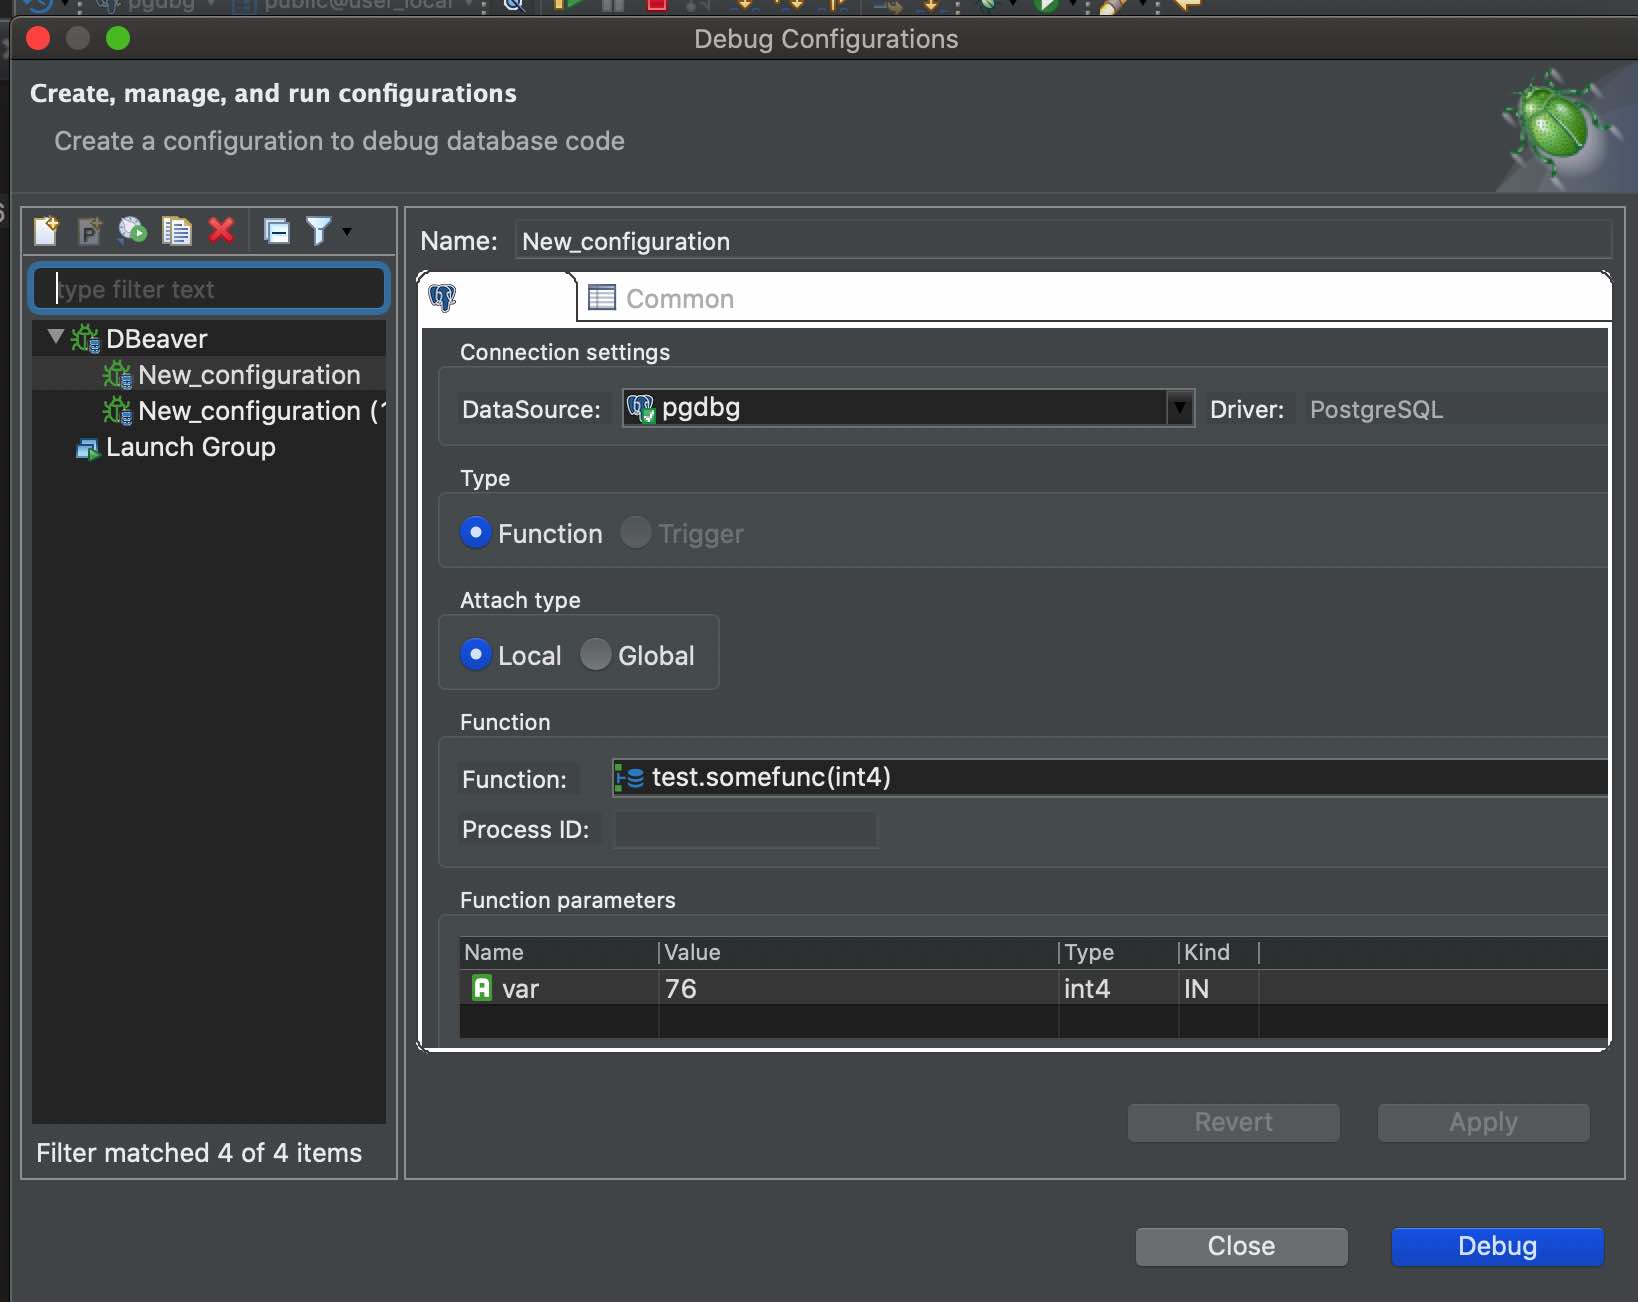
To debug with dbeaver, install extension :
CREATEEXTENSIONpldbgapi;
Install debug extension in dbeaver (if not yet)
Help -> Install new software
Search and install debugger Click “ok”, “accept”, “confirm”… to install
After restart dbeaver, you should see a debug icon:
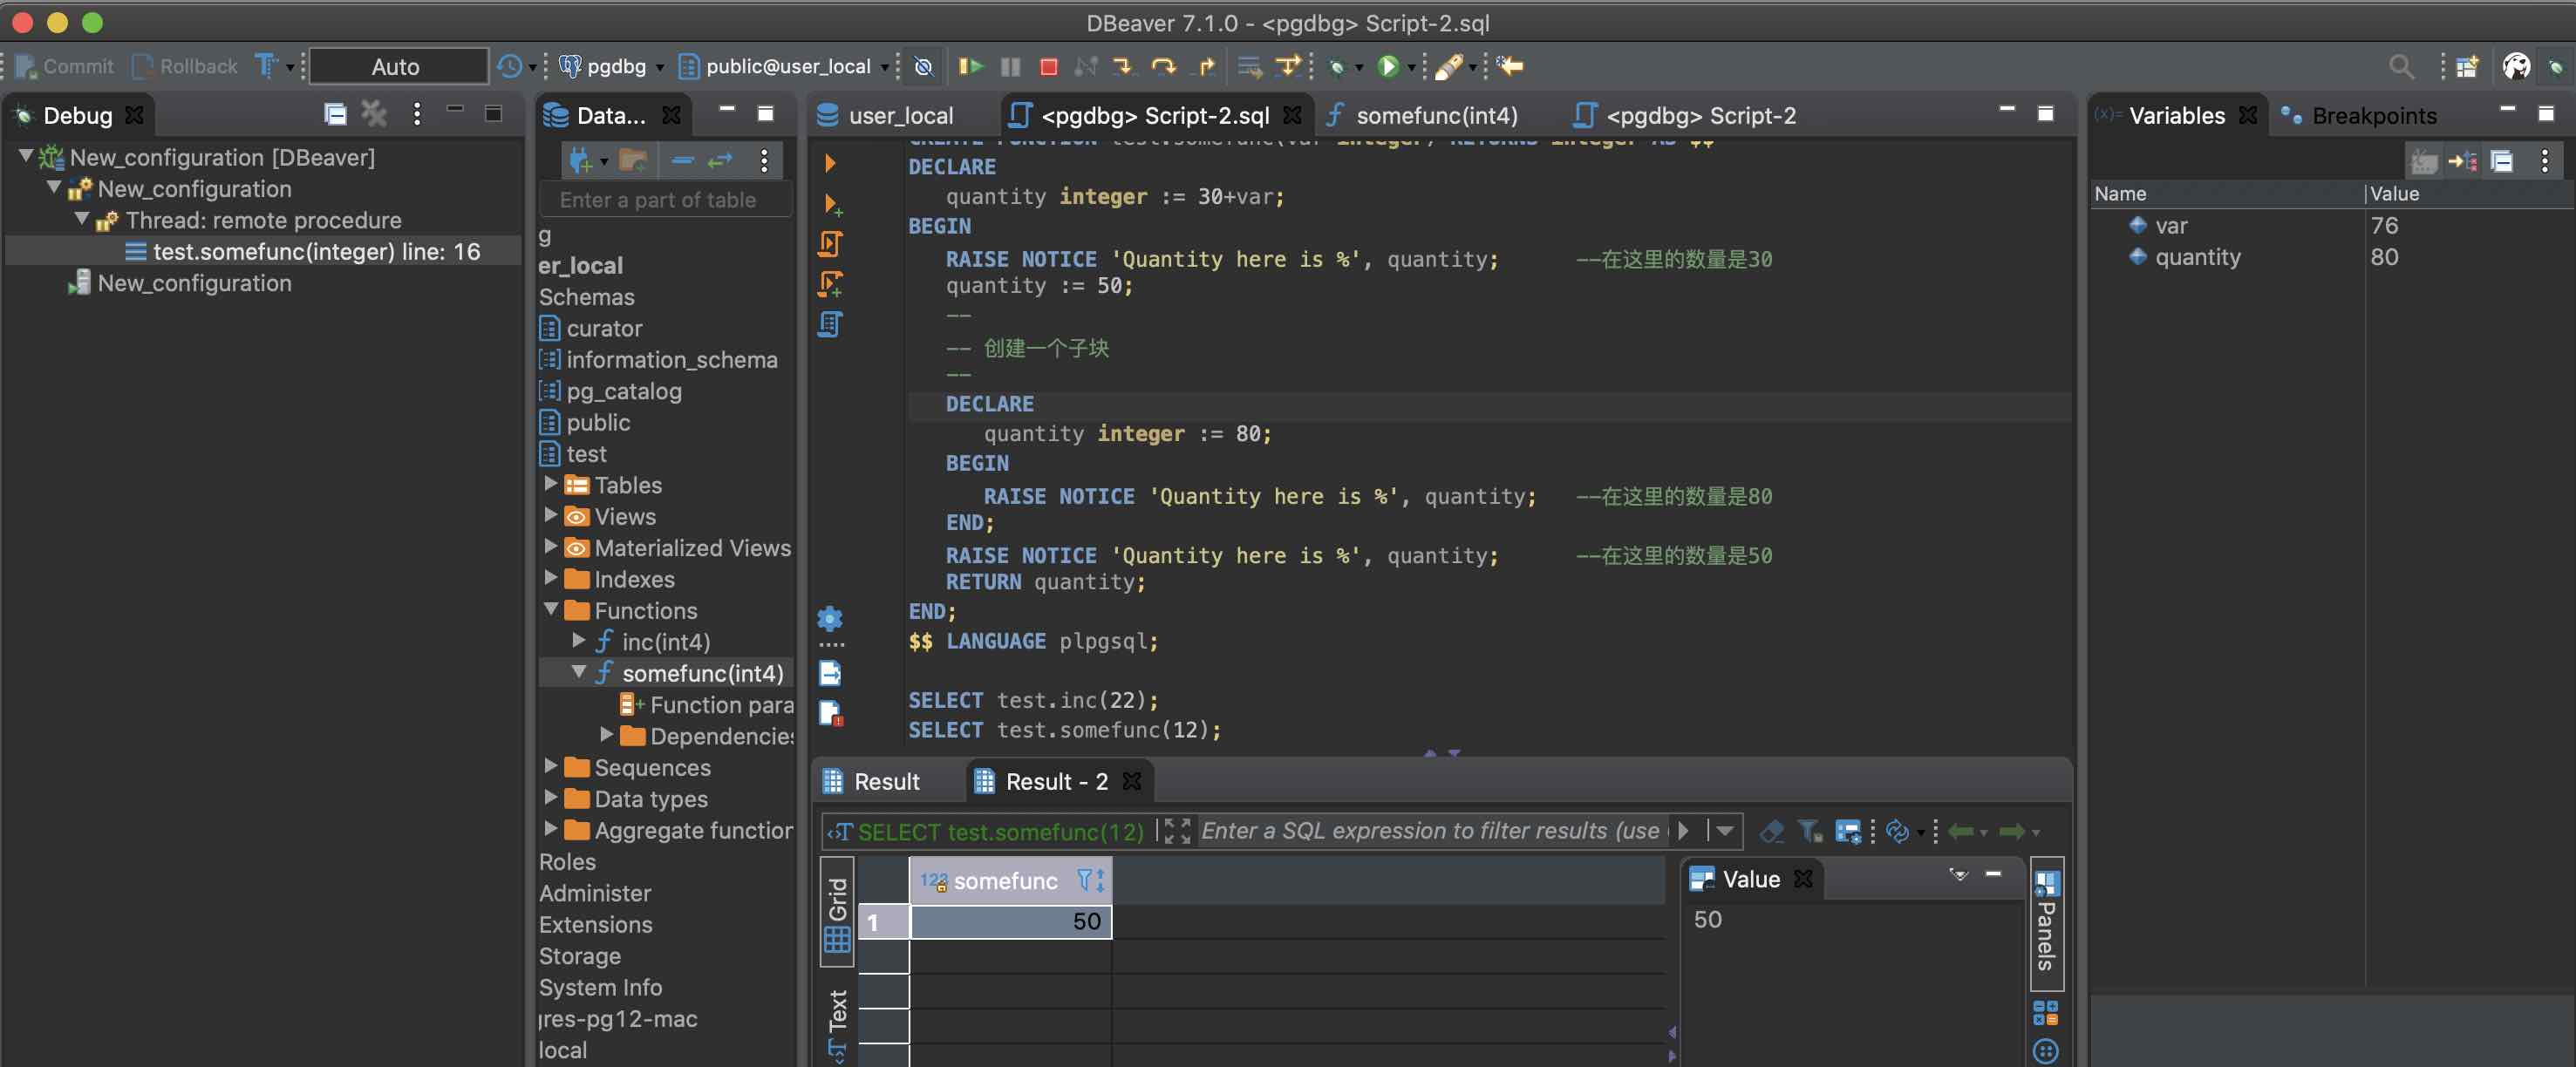
Create a demo sql:
CREATESCHEMAtest;DROPfunctionifexiststest.somefunc(varinteger);CREATEFUNCTIONtest.somefunc(varinteger)RETURNSintegerAS$$DECLAREquantityinteger:=30+var;BEGINRAISENOTICE'Quantity here is %',quantity;--在这里的数量是30quantity:=50;---- 创建一个子块--DECLAREquantityinteger:=80;BEGINRAISENOTICE'Quantity here is %',quantity;--在这里的数量是80END;RAISENOTICE'Quantity here is %',quantity;--在这里的数量是50RETURNquantity;END;$$LANGUAGEplpgsql;SELECTtest.somefunc(12);
Configure a debug session:
Specify database, function, aurgument:
This had never been a issue until I give up vimr and use kitty + neovim. I found that my <S-Fn> no longer works.
Well, do panic, use infocmp or keybind or keycode to find out how the key is defined (also can use cat or sed
-n -l).
For kitty <S-F1> key code is ^[[1;2P . Here ^[ means <Esc> or \E
vim and neovim handle key code slight different.
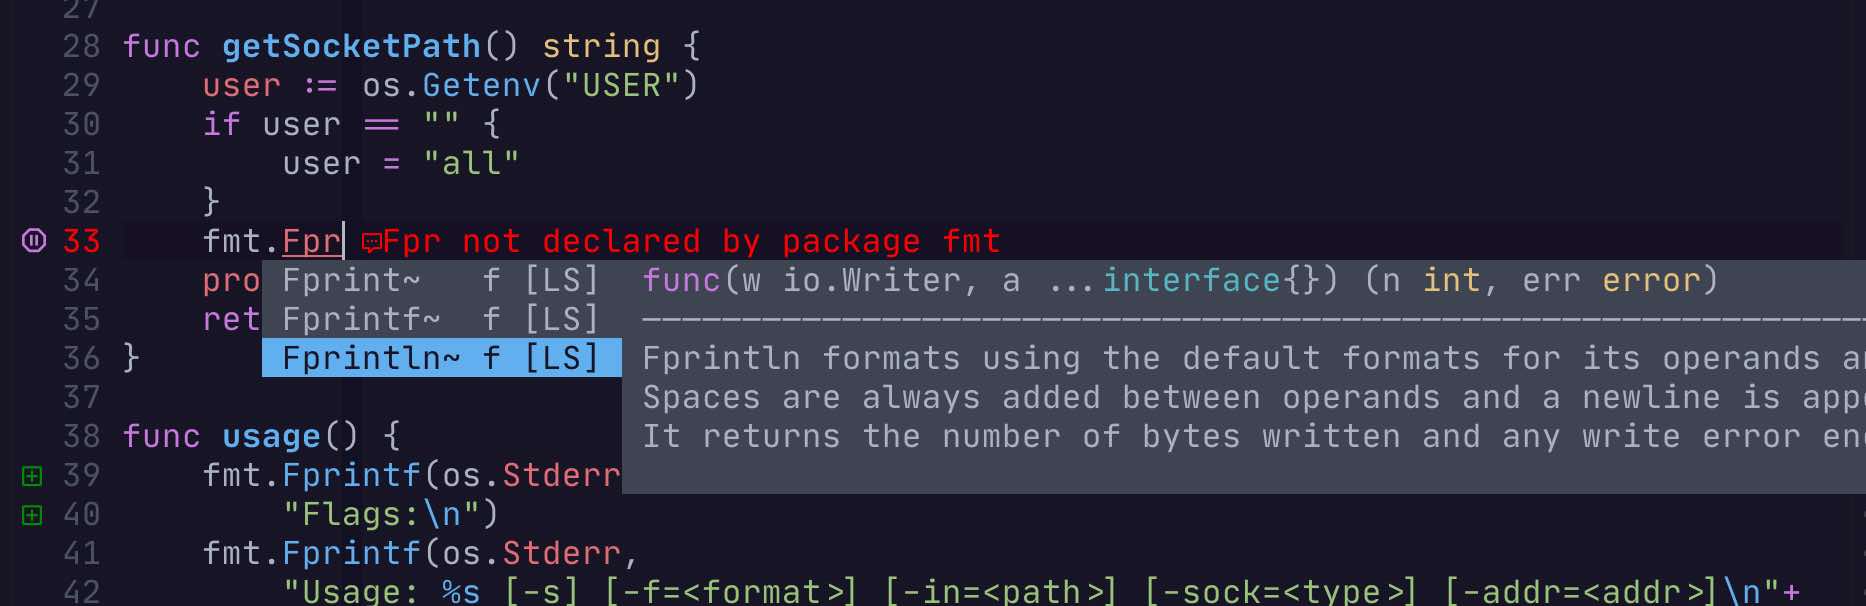
for neovim, S-Fn was map to F(12+n) , e.g. S-f1 mapped to F13.
So you can do this:
I used to use slickedit, qt-creator, idea (webstorm, goland), vscode, but I am back to vi now. Thanks for Plug I do
not need to configure my setup everytime....... I am still using sublime edit(as a notepad)
vimr is one of the best nvim-gui. But it does not in active development in last 3 months(It is hard for a one developer
project), some of the crash durning coding is annoying. I only use nvim/vim + kitty now.
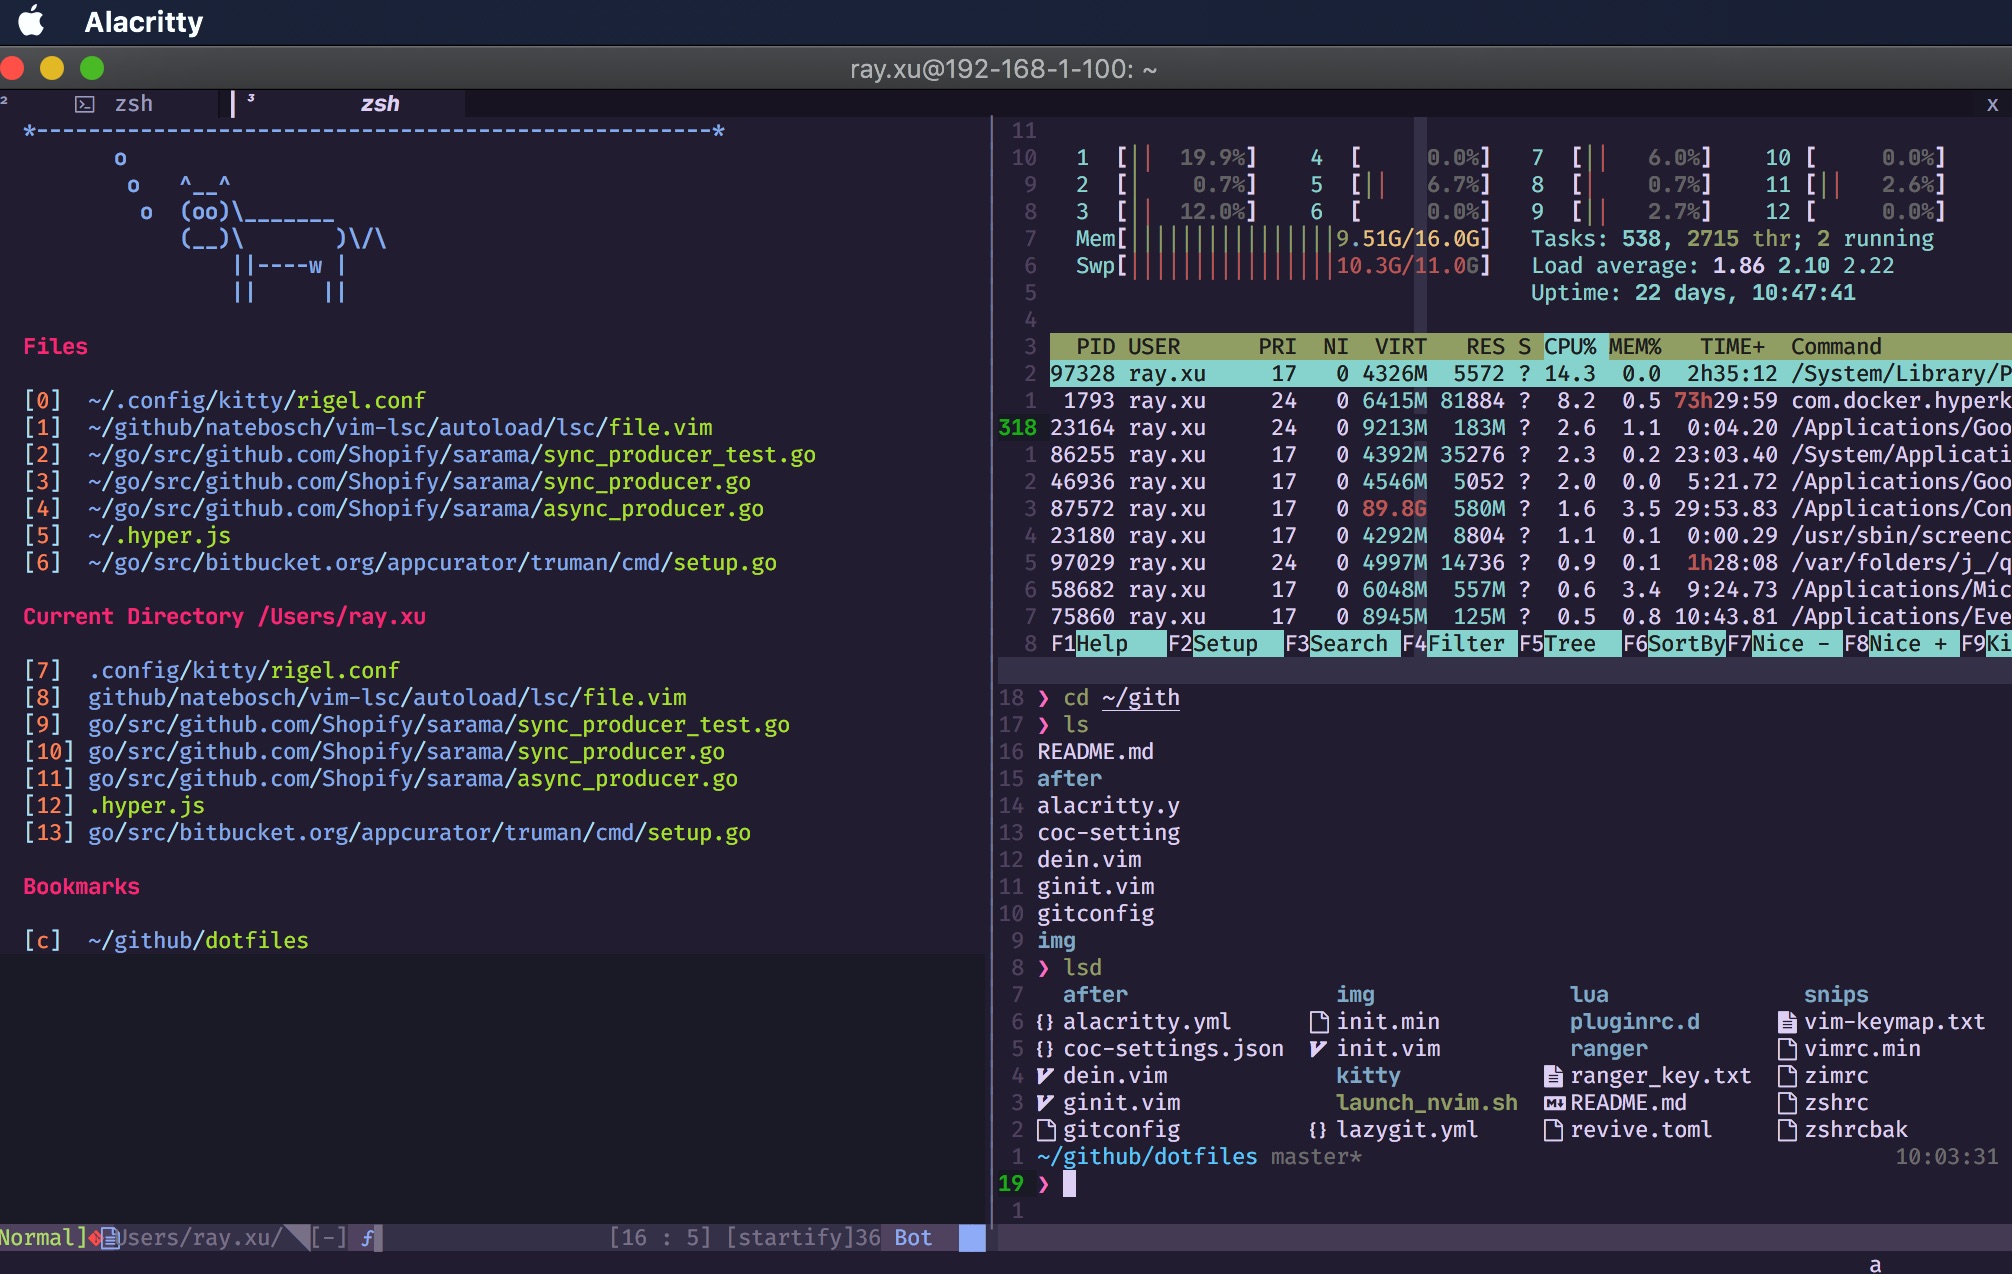
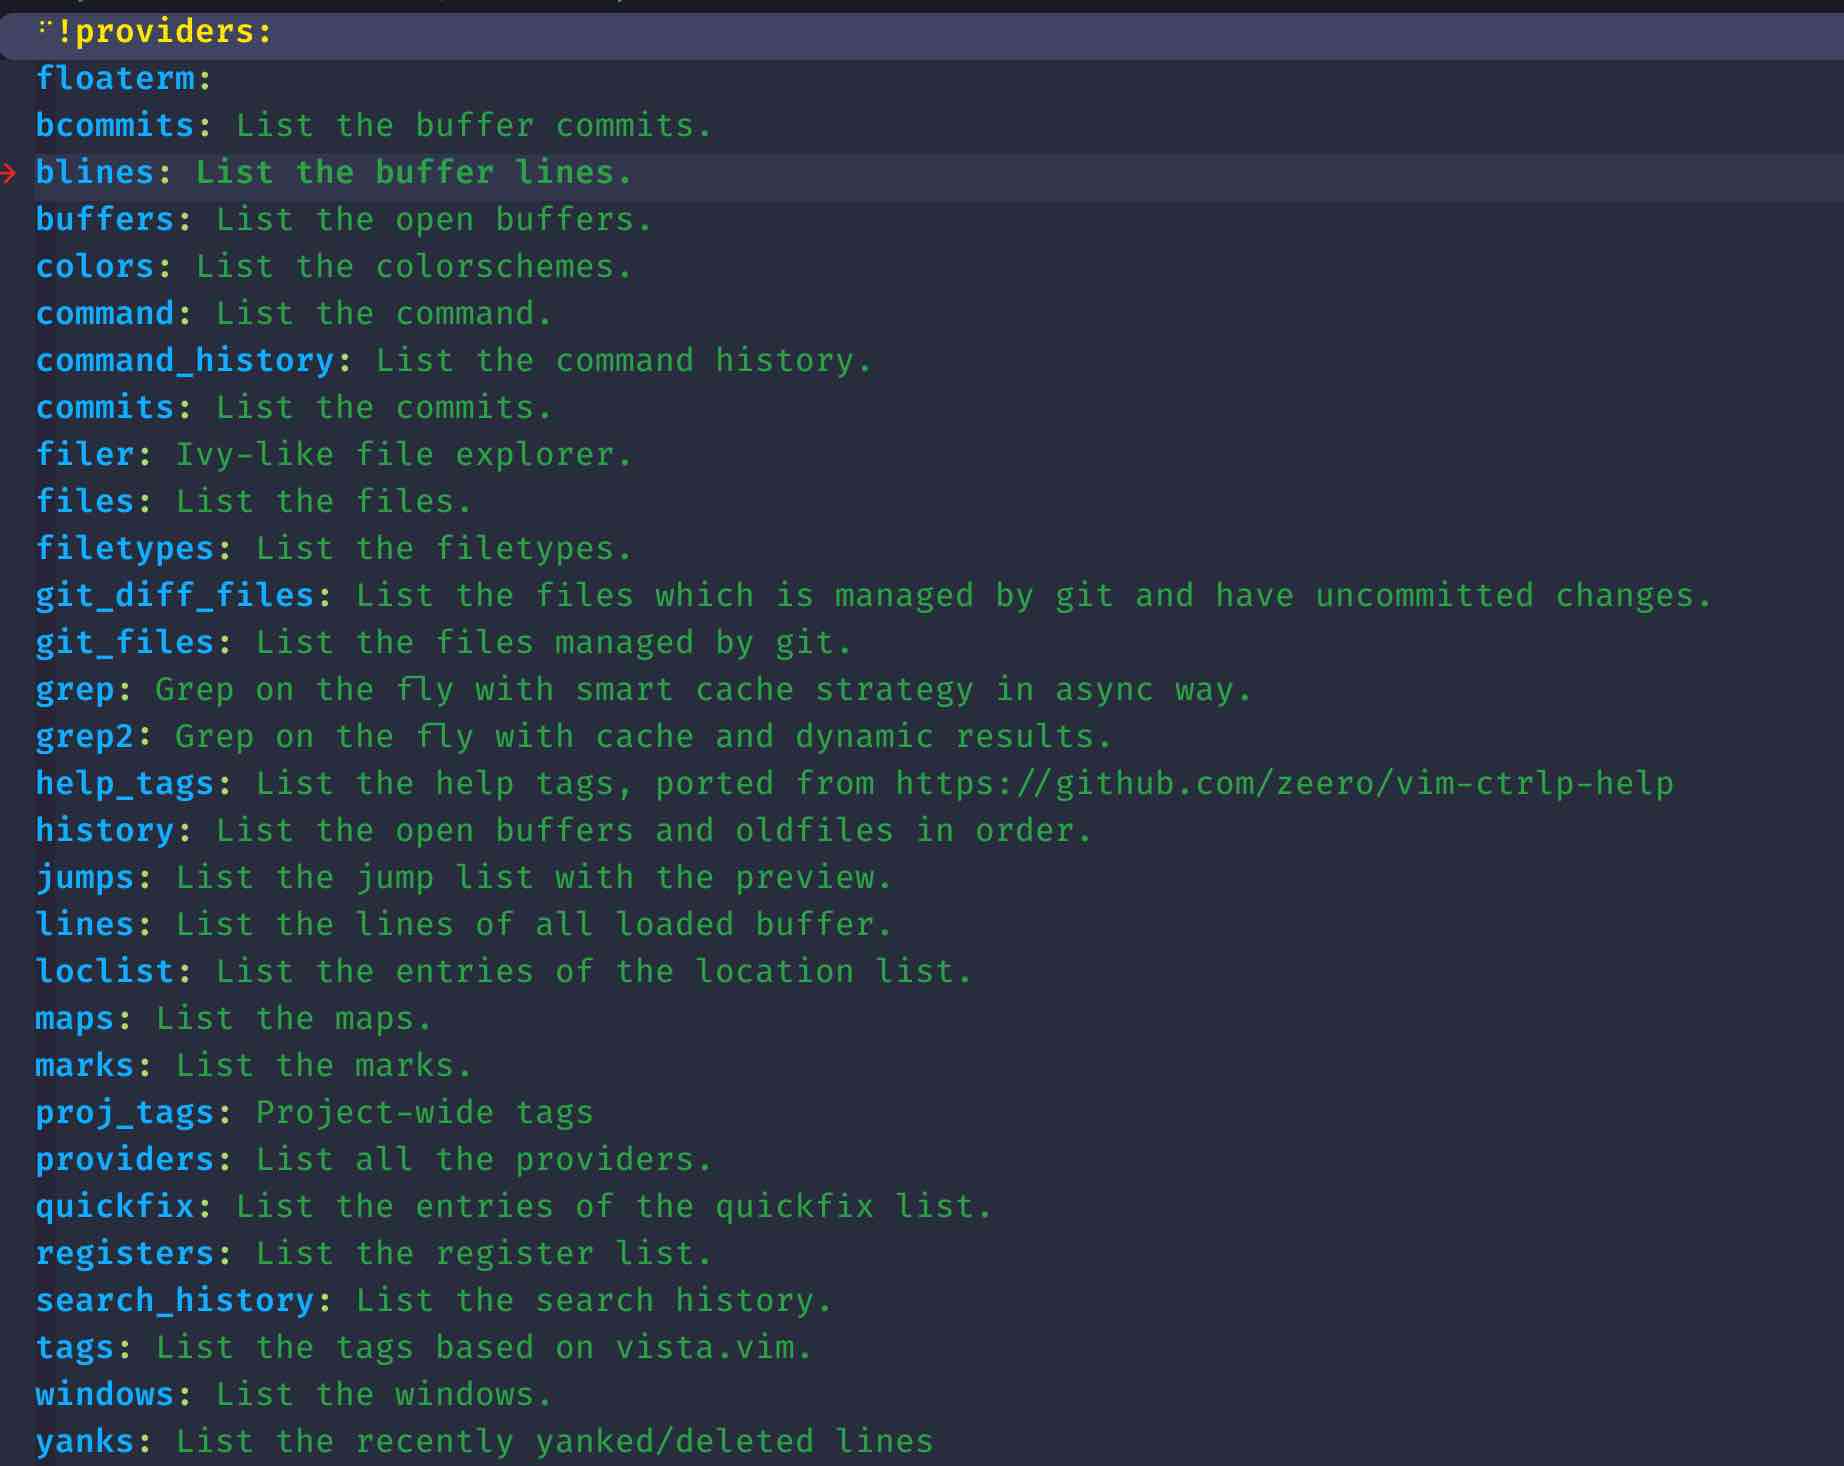
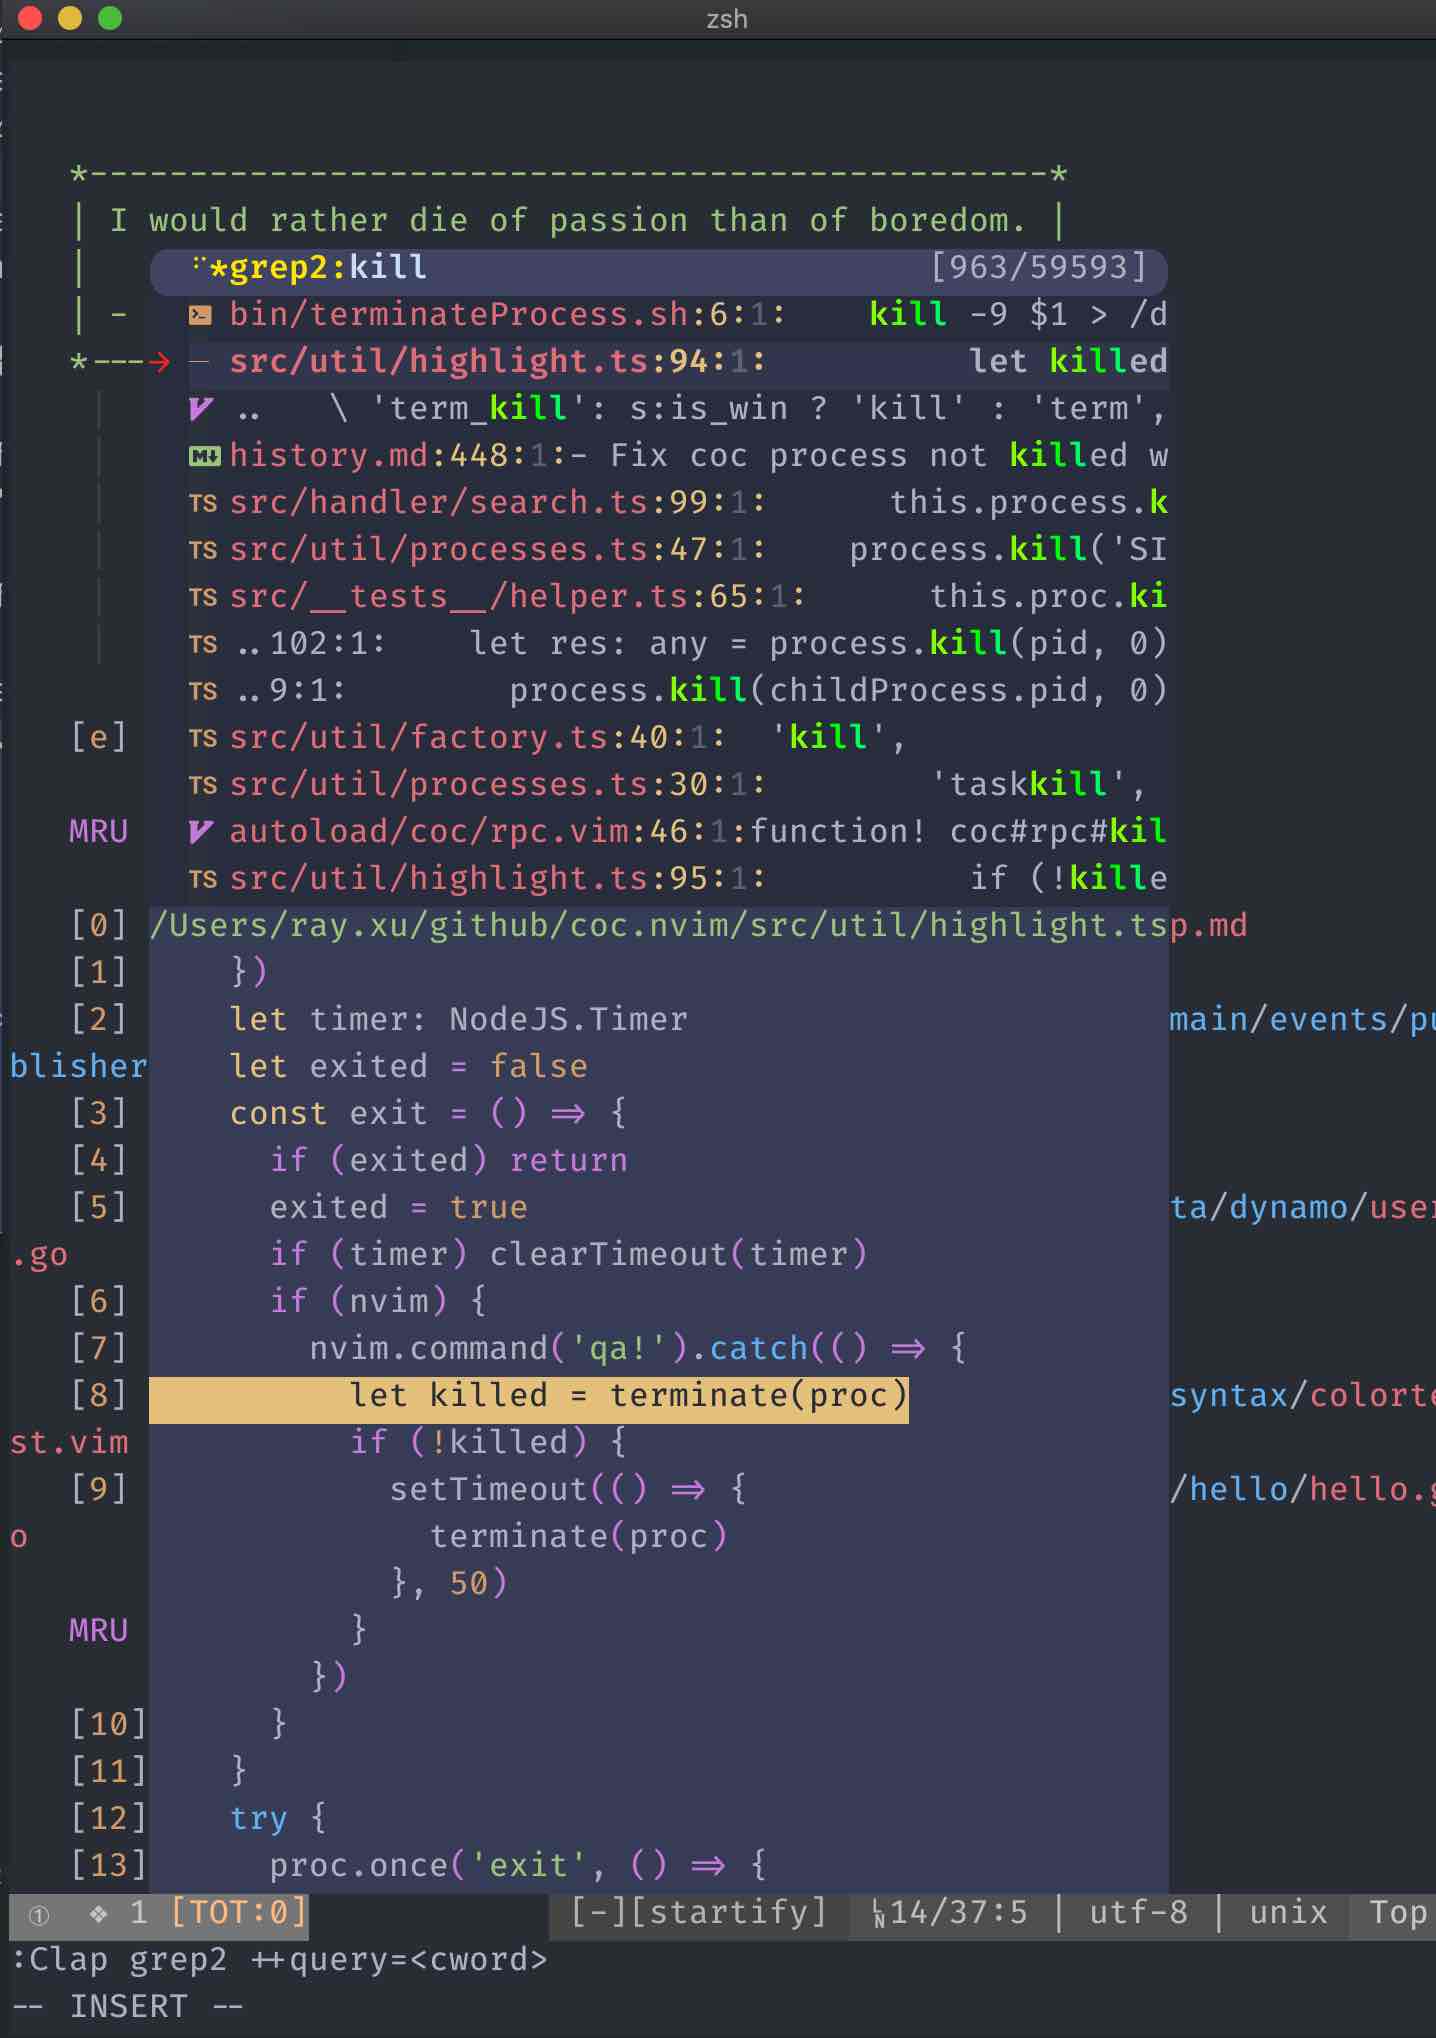
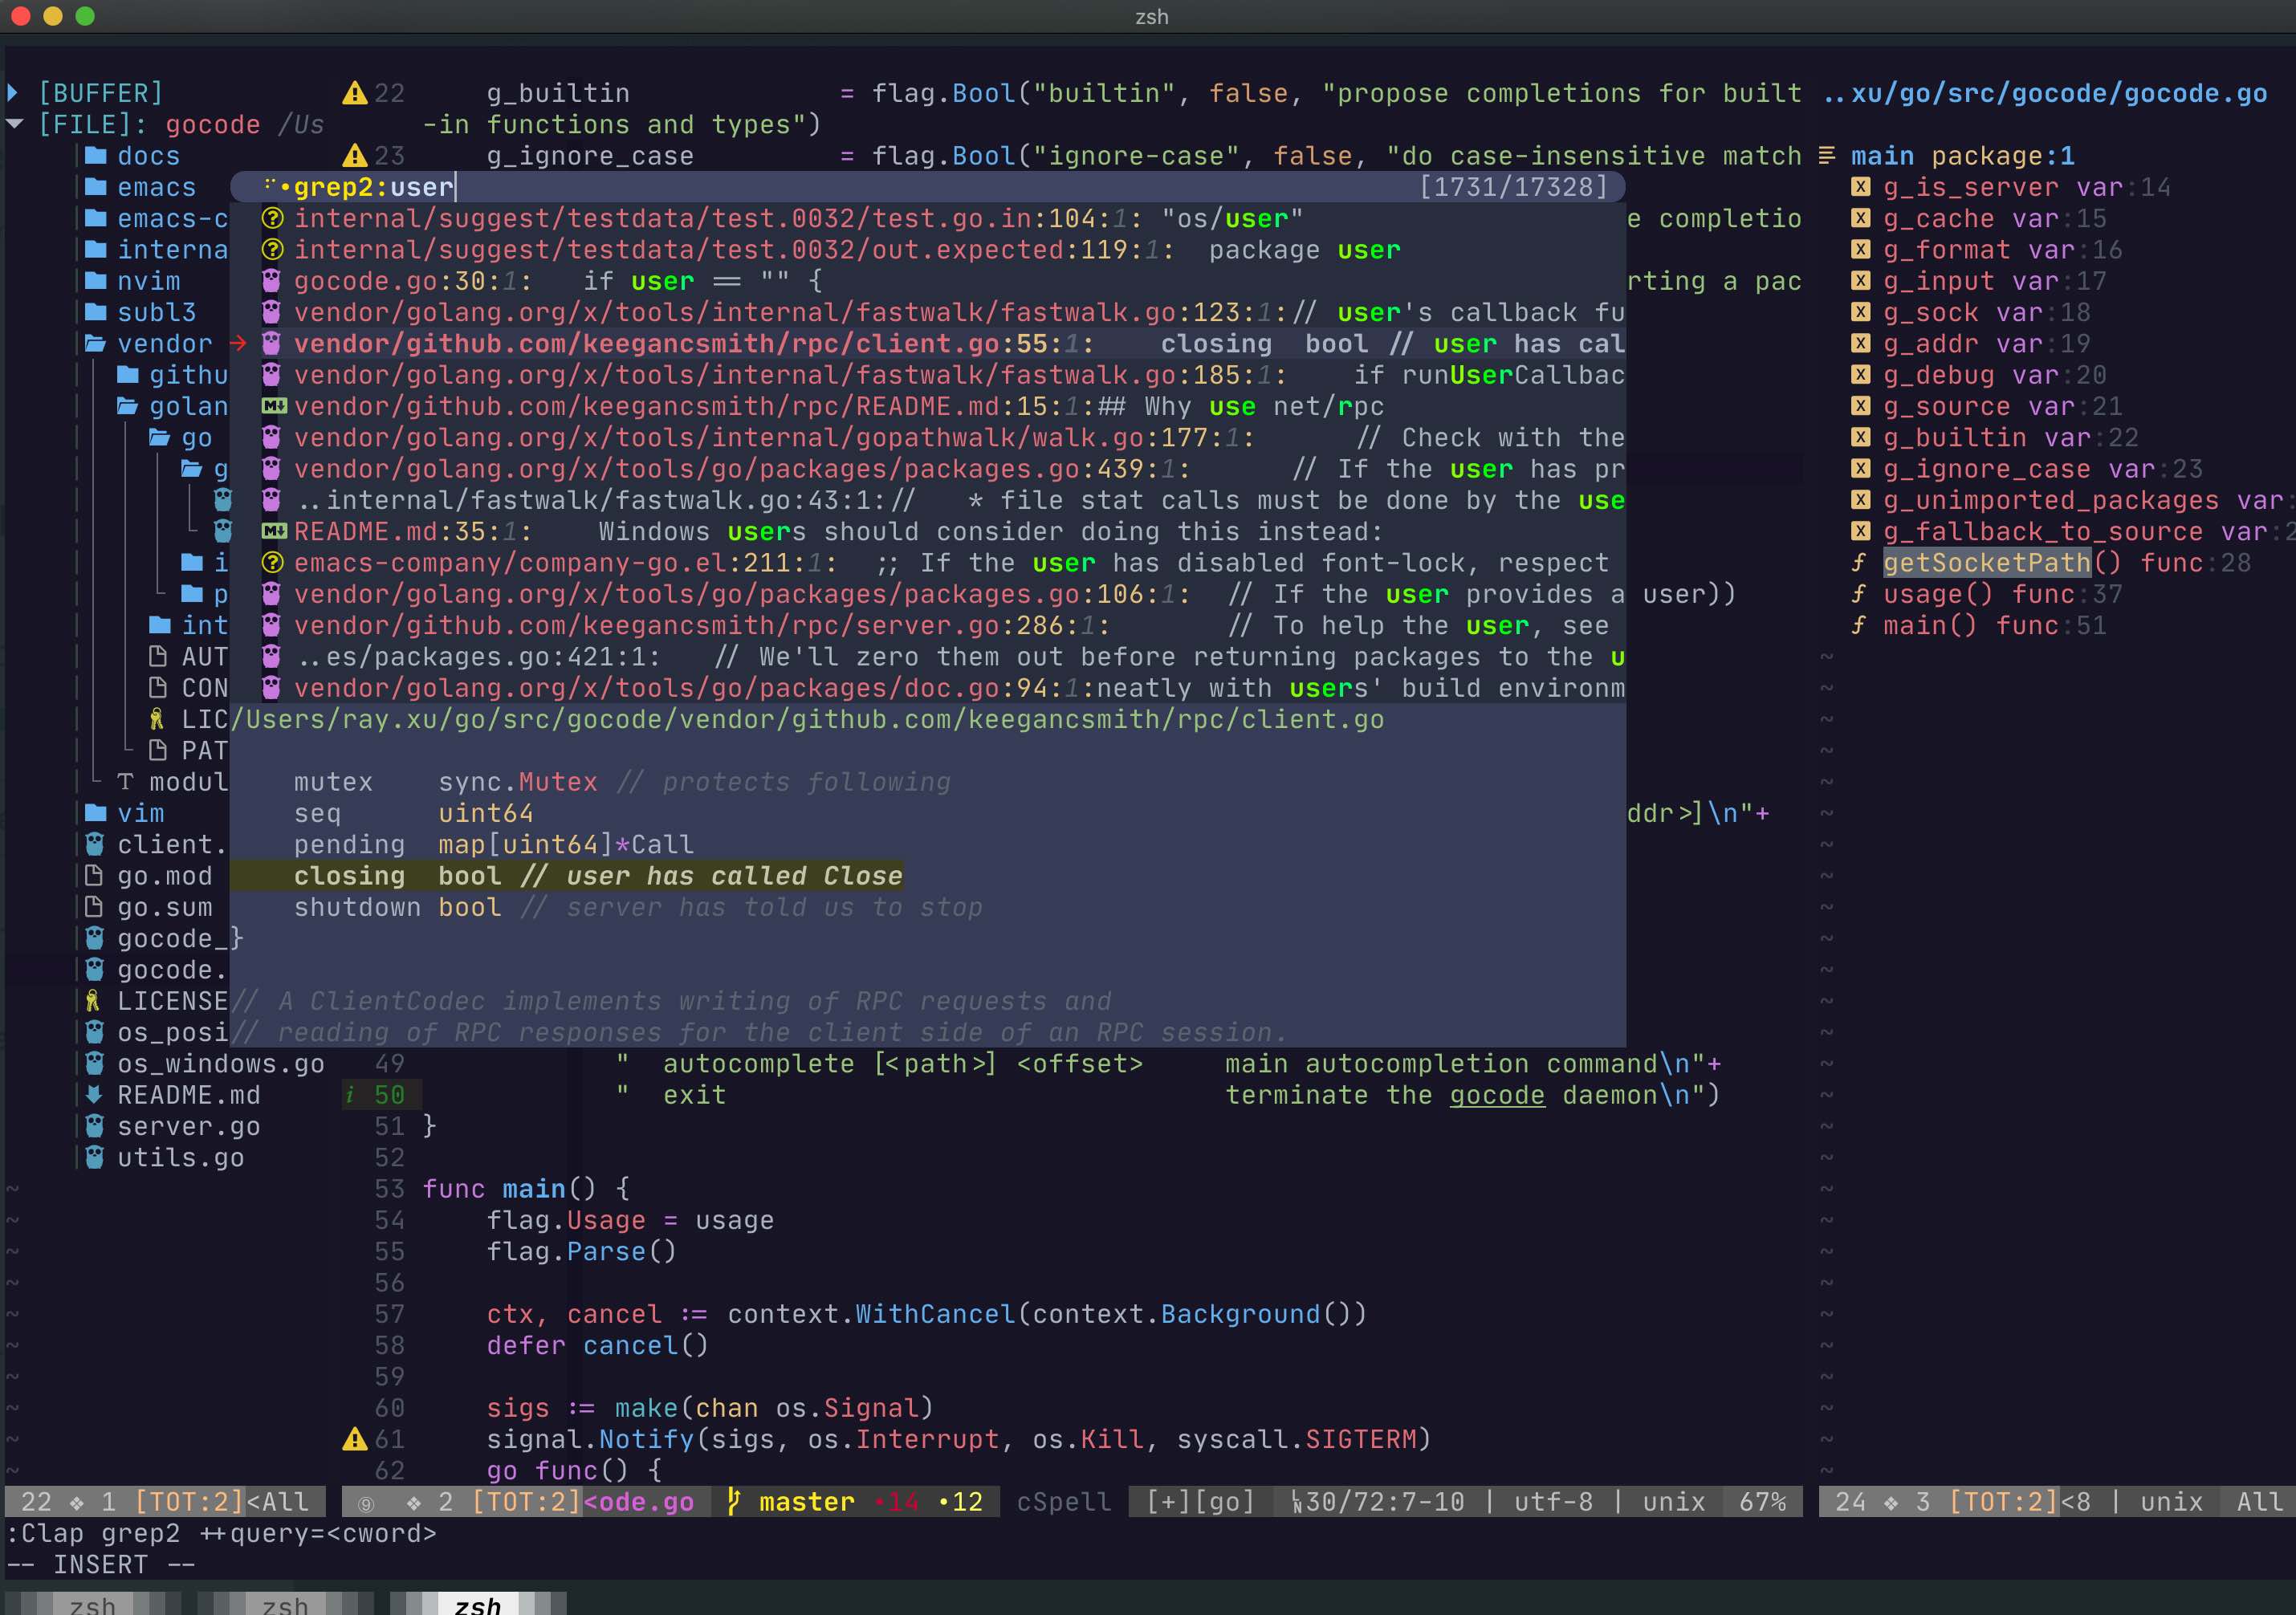
Best plugin for search anything. I used it to replace fzf, leaderF, leaderP, NerdTree, Ag/Ack/Rg, yank(ring), project management. undolist and many more
coc.nvim
I disabled vim-go and turn to coc-go. Replace defx with coc-explorer, use coc-spell for spell check
coc-snippet replaced my ultisnips. Also, there are coc for yml, json, prettier, python, rust, PHP (any language vs code
supported)......
ALE
well, I am still using ALE and configure lots of lint tool with it.
Programming support:
YCM (used to be my favourite, only for C++ and python now), but I am using coc.nvim more offen now,
vim-go(for go testing, highlight, gopls disabled),CompleteParameter, emmet-vim, tagbar/vista, polygot,
and some language specific plugins (e.g html, js/ts, swift), ctags/gutentags, vim-less, govim(macvim only, with some cool AST)
nvim-colorizer.lua (display hex and color in highlight), rainbow, log-highlight, limelight, interestingwords
Git:
fugitive, gv, coc-git
Format:
tabular, coc-prettier(or, sometimes prettier), auto-pair
Menu and tab:
quickui(created a menu for the function/keybind I used less often. I can not rememeber all the commands and keybinds....)
wintab: one of the best buffer management tool
I have been used this tool for a while, it do have a nice UI design and lots of features. But I need a professional
licence to use it to connect to kafka.
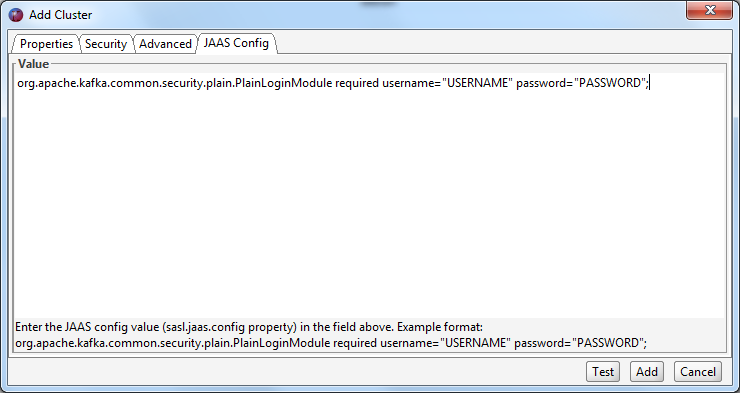
To setup SASL
Need to chang bootstrap, security, sasl configure:
akhq:
  server:
    base-path: "" # if behind a reverse proxy, path to akhq without trailing slash (optional). Example: akhq is
                  # behind a reverse proxy with url http://my-server/akhq, set base-path: "/akhq".
                  # Not needed if you're behind a reverse proxy with subdomain http://akhq.my-server/
    access-log: # Access log configuration (optional)
      enabled: true # true by default
      name: org.akhq.log.access # Logger name
      format: "[Date: {}] [Duration: {} ms] [Url: {} {} {}] [Status: {}] [Ip: {}] [Length: {}] [Port: {}]" # Logger format

  # default kafka properties for each clients, available for admin / producer / consumer (optional)
  clients-defaults:
    consumer:
      properties:
        isolation.level: read_committed

  # list of kafka cluster available for akhq
  connections:
    my-cluster-sasl:
      properties:
        bootstrap.servers: "1.236.23.21:9092,3.15.1.12:9092,3.15.16.69:9092"
        security.protocol: SASL_PLAINTEXT
        sasl.mechanism: PLAIN
        sasl.jaas.config: org.apache.kafka.common.security.scram.ScramLoginModule required username="your username" password="your password";

  pagination:
    page-size: 25 # number of elements per page (default : 25)
    threads: 16 # Number of parallel threads to resolve page
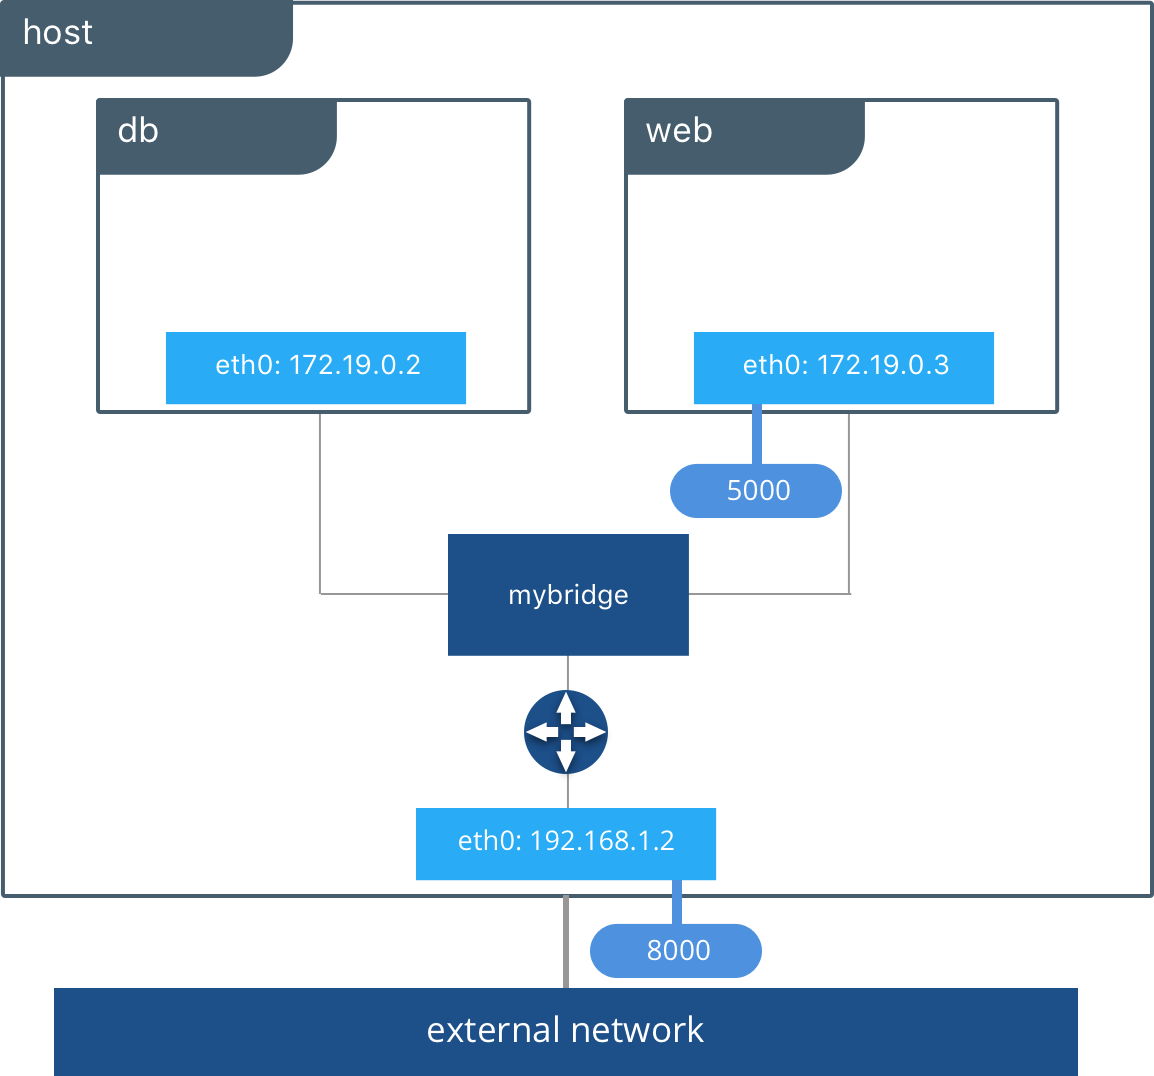
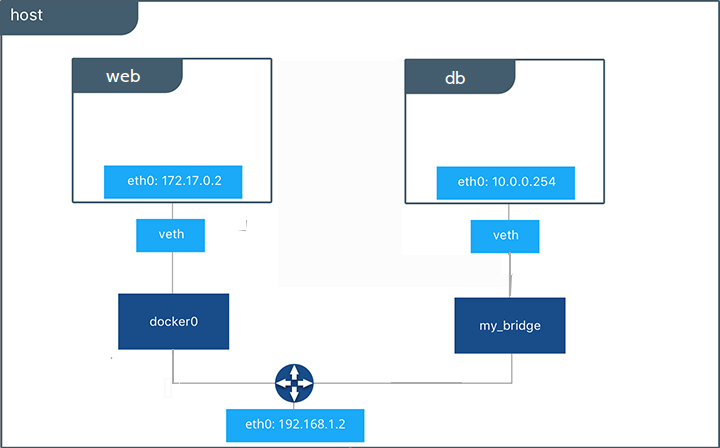
docker run --name mydocker1 -it --network bridge -h mydocker1.rayx.me --dns 8.8.8.8 --dns-search rayx.me --add-host www.rayx.me:54.12.17.68 --rm busybox:latest
Above command will create a docker named mydocker1 with bridge network.
The host name mydocker1.rayx.me, use dns 8.8.8.8
in /etc/hosts will have :
The 80 port was mapped to
So you could access the web through curl 127.0.0.1:32768
Or with docker port
dockerport7a96c7ddeb1e
80/tcp->0.0.0.0:32768
* -p : map containerPort to hostPort
e.g. `docker run --name busybox-web1 --rm -p 8080::80 ray-x/httpd-busybox:v0.2`
-p :: map containerPort to host dynamic port (e.g 192.168.0.2:8080)
e.g. docker run --name busybox-web1 --rm -p 192.168.10.10::80 ray-x/httpd-busybox:v0.2
All access to docker 80 will need to through 192.168.10.10 network + a dynamic port
-p ::: map containerPort to host and port
e.g. docker run --name busybox-web1 --rm -p 192.168.10.10:8080::80 ray-x/httpd-busybox:v0.2
start up container b1
docker run --name b1 --rm -it busybox
start up container b2 and join network of b1
docker run --name b2 --rm -it --network container:b1 busybox
run ifconfig on both docker container and the ip address will be the same (in my test both are 172.17.0.2)
b1 and b2 share network and 127.0.0.1 in b1 is same as 127.0.0.1 in b2. e.g start a webserver in b1 and you can use 127.0.0.1:80 to access the http from b2
e.g: Get a busy box image and create a file inside container
docker run --name base1 -it busybox
Unable to find image 'busybox:latest' locally
latest: Pulling from library/busybox
d9cbbca60e5f: Pull complete
Digest: sha256:836945da1f3afe2cfff376d379852bbb82e0237cb2925d53a13f53d6e8a8c48c
Status: Downloaded newer image for busybox:latest
/ #mkdir -p /data/html
vi index.html
<h1>Busybox httpd server. </h1>
In another terminal create a new image and check it
docker commit -p  -a "rayx1" -m "a base image with index.html" base1
docker image ls
REPOSITORY          TAG                 IMAGE ID            CREATED              SIZE
<none>              <none>              64e381aeac90        55 seconds ago       1.22MB
you will see a un-named image. To tag a image use docker tag
Usage:  docker tag SOURCE_IMAGE[:TAG] TARGET_IMAGE[:TAG]

Create a tag TARGET_IMAGE that refers to SOURCE_IMAGE
e.g tag it to user rayx1 with name httpd-busybox and tag v0.1
docker tag 64e381aeac90 rayx1/httpd-busybox:v0.1
Also you could use multiple tags
docker tag rayx1/httpd-busybox:v0.1 rayx1/httpd:latest
You will see:
REPOSITORY            TAG                 IMAGE ID            CREATED             SIZE
rayx1/httpd-busybox   v0.1                64e381aeac90        6 minutes ago       1.22MB
rayx1/httpd           latest              64e381aeac90        6 minutes ago       1.22MB
docker run --name base2 rayx1/httpd-busybox:v0.2 Use docker inspect base2 get the ipaddress
"IPAddress": "172.17.0.3", and you can check the http with lynx 172.17.0.3
Options:
  -a, --attach               Attach STDOUT/STDERR and forward signals
      --detach-keys string   Override the key sequence for detaching a container
  -i, --interactive          Attach container's STDIN
Note: You can not re-run a container image again. You have to start/stop/restart your container. container run only
can be used for start a new container
note you can also login into other docker image registry. e.g to login into aliyun docker
docker login -u rayx1 registry.cn-beijing.aliyuncs.com and push
docker push registry.cn-beijing.aliyuncs.com/rayx1/httpd-busybox:v0.2
docker save [OPTIONS] IMAGE [IMAGE...] e.g pack http-busybox into httpd.gzdocker save -o httpd.gz rayx1/httpd-busybox:v0.2 or multiple image into a file
docker save -o httpd.gz rayx1/httpd-busybox:v0.2 rayx1/busybox
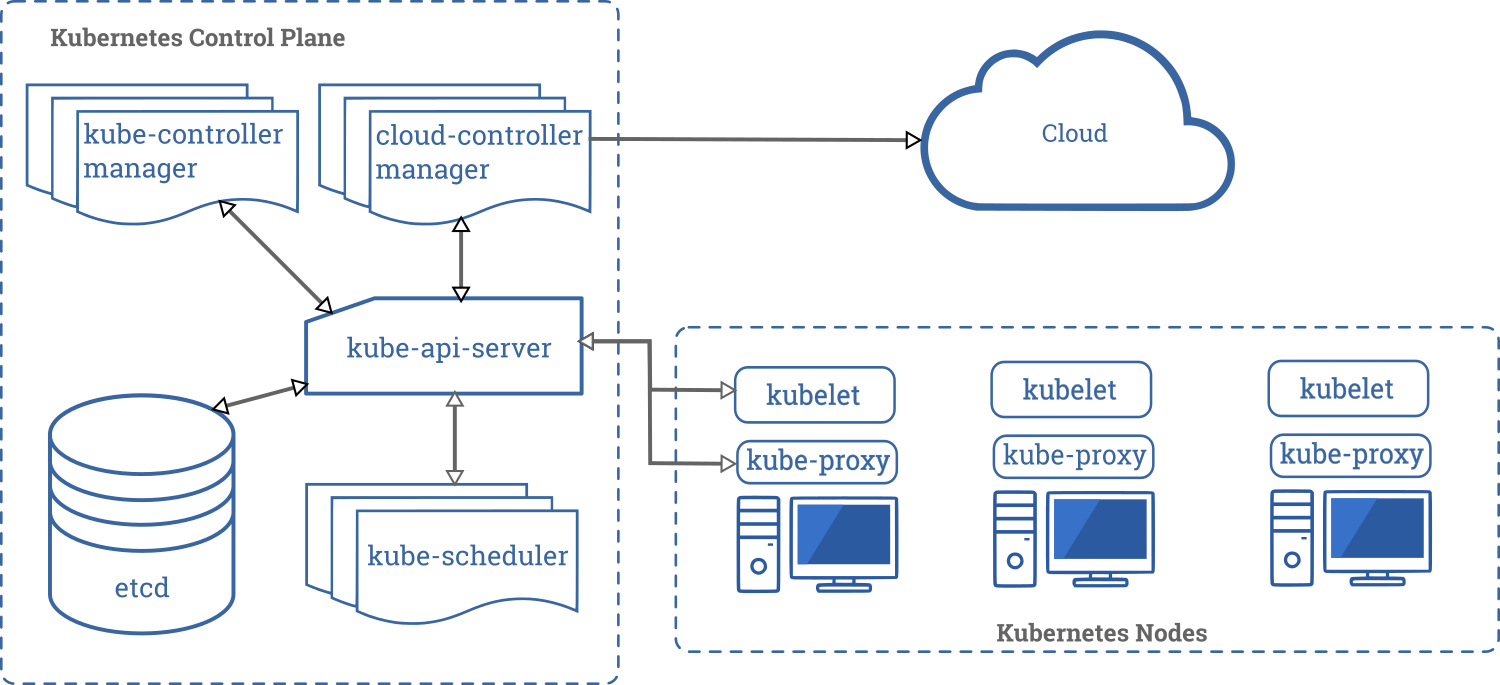
Kubernetes, AkA k8s.Kubernetes, is an Production-Grade Container Orchestration System. It can automating deployment, scaling, and managing containerized applications.
controller: Control loops that watch the state of your cluster, then make or request changes where needed. Each controller tries to move the current cluster state closer to the desired state.
Node controller: Monitor nodes. Noticing and responding when nodes go down.
Endpoints controller: Populates the Endpoints object
Replication controller: Responsible for maintaining the correct number of pods for every replication controller object in the system.
Service Account & Token controllers: Create default accounts and API access tokens for new namespaces.
Kubernetes created a Pod to host your application instance. A Pod is a Kubernetes abstraction that represents a group of one or more application containers (such as Docker or rkt), and some shared resources for those containers. Those resources include:
Shared storage, as Volumes
Networking, as a unique cluster IP address
Information about how to run each container, such as the container image version or specific ports to use
Pod is a virtual machine to host docker containers/applications
Pods overview
Normally, we group containers that logically coupled together in a Pod. But in most case we run a single container in a Pod.
A Node is a machine that host Pods.
Node can be either virtual machine or physical machine.
Node is consisted with :
* kubelet
* kube-proxy
* Pods
* docker(or other container)
Horizontal Pod Autoscaler automatically scales the number of pods in a replication controller, deployment, replica set or stateful set based on observed CPU utilization or, metrics.
On Linux hosts, if the kernel detects that there is not enough memory to perform important system functions, it throws an OOME, or Out Of Memory Exception, and starts killing processes to free up memory. (Most likely a Java application :-P)
Docker attempts to mitigate these risks by adjusting the OOM priority on the Docker daemon so that it is less likely to be killed than other processes on the system.
-oom-score-adj to adjust the priority
--oom-kill-disable
* -m or –memory= e.g. -m 32m
* –memory-swap The amount of memory this container is allowed to swap to disk.
–memroy-swap
-m
explain
passive S
passive M
Container total space S, RAM: M, swap S-M, if S==M, no SWAP allocated
0
positive
swap unset (same as below)
unset
positive M
if swap enabled in host , total swap 2*M
-1
positive M
if Host enabled swap, container can use up all swap space
 Search and install


 )
)
 Node can be either virtual machine or physical machine.
Node is consisted with :
* kubelet
* kube-proxy
* Pods
* docker(or other container)
Node can be either virtual machine or physical machine.
Node is consisted with :
* kubelet
* kube-proxy
* Pods
* docker(or other container)